1. Introduction
Deflekt, a bone conduction earphone app, features two primary modes: "Create Set" for designing and playing back vibration patterns, and "Play a Playlist" for sequencing sets in any order.
Deflekt, a bone conduction earphone app, features two primary modes: "Create Set" for designing and playing back vibration patterns, and "Play a Playlist" for sequencing sets in any order.
Combine tone and beat sources to generate vibrations output through bone conduction earphones. These combinations can be saved as sets and loaded from the Set Management. "Create Set" has the following functions:

Create Set Screen
On this screen, you can use carrier and modulator waves to create basic sounds. You can also fine-tune the timbre with harmonic adjustments and make final volume adjustments. In addition, it is possible to enable sound quality correction with the equalizer. Furthermore, by using the sequence function, you can program patterns where the sound turns on and off along the timeline. This allows for more complex and dynamic sound expressions, not just sustained tones.

Tone Sound Source Settings Panel

Sets the carrier wave for the sound.
Set the frequency of the carrier wave, which determines the basic pitch of the sound. Increasing the value raises the pitch, while decreasing it lowers the pitch.
Setting the carrier frequency below 1Hz produces a tremolo effect, where the volume pulsates, creating a deep, throbbing "woom-woom" sound.


Adjust the starting timing of the carrier wave. Changes to this parameter alone may not be easily noticeable, but when combined with the modulator wave described later, it can change the way the waveforms overlap, subtly affecting the attack and timbre. 0.00 usually represents the standard starting point of the waveform.
Modulates the carrier wave. This allows for the creation of timbres with complex harmonics that cannot be achieved with a simple carrier wave.
Controls the frequency of the modulator. At low frequencies, this creates a vibrato effect. At high frequencies, it generates rich harmonics that alter the timbre.
Adjusts the starting phase of the modulator. Similar to the carrier's phase, this shifts when the modulation begins, subtly altering the timbre and character of the sound.
Adjust specific overtone components contained in the timbre.

Turning on the “2nd,” “3rd,” “4th,” “5th,” or “6th” buttons emphasizes the corresponding overtones—2x, 3x, 4x, 5x, or 6x the base frequency. Emphasizing the “2nd” (one octave above) makes the sound fuller. Adding the “3rd” creates a richer and more complex tone. Higher overtones like the “5th” or “6th” can make the sound brighter, sharper, or more metallic.
Set the volume of this tone sound source.
This is a 3-band channel equalizer for adjusting the timbre. It divides the sound into three frequency bands (high, mid, low) and adjusts the amplification of each band.
Using the equalizer, you can suppress specific harsh resonances and adjust the dynamics of the vibrations.
On/Off switch

Toggle the equalizer function on/off.
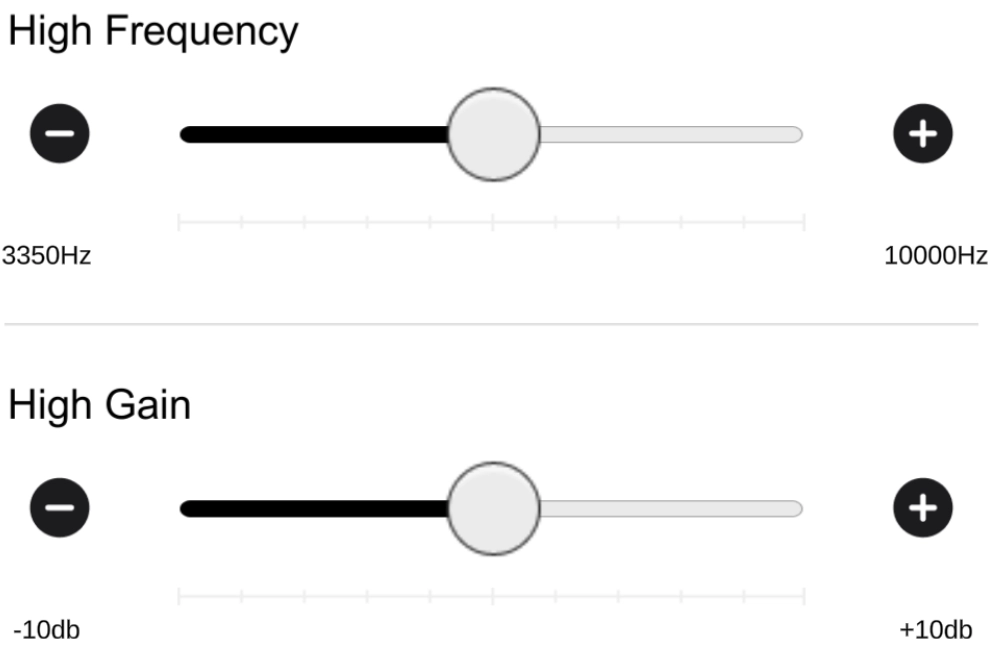
High Frequency Adjustment
Mid Frequency Adjustment
Low Frequency Adjustment
Reset Button

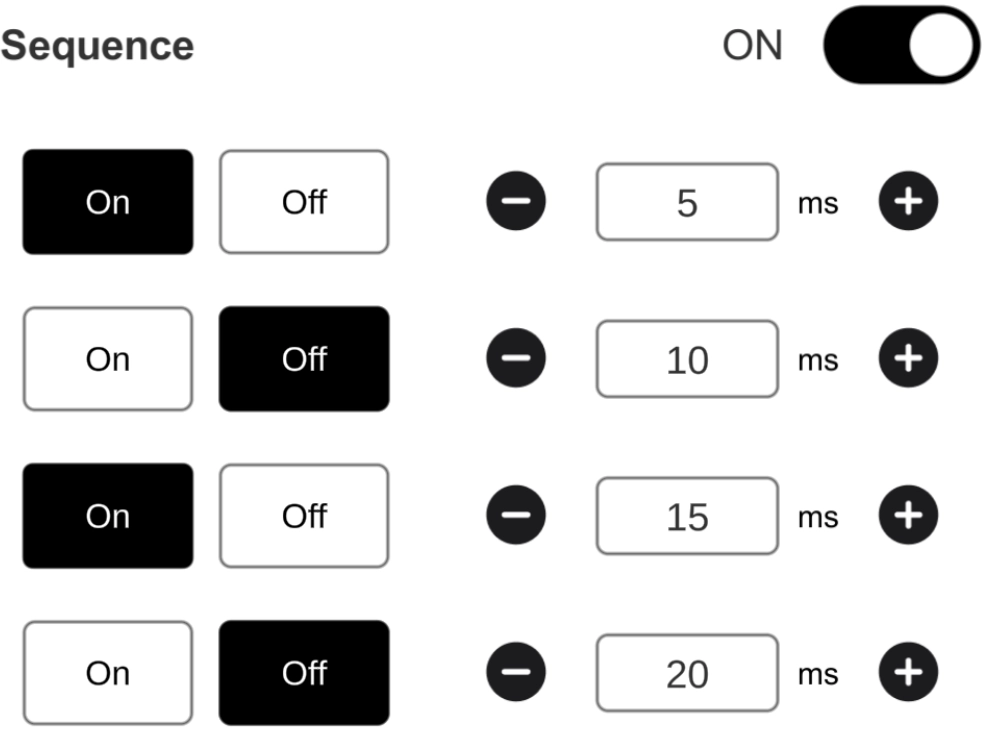
Create patterns that control the sound's on/off state over time.
Sequence On/Off switch

Step Settings

 Tap the minus button to decrease the duration time.
 Tap the plus button to inclease the duration time.
Reset button
Example
You can create your own rhythm patterns with the step sequencer and finely adjust the speed, timing, volume, pitch, length, decay, and distortion of the sounds played in those patterns. The rhythmic vibrations occupy the body's senses, allowing the brain and mind to regain space from preoccupation with other thoughts, allowing you to focus on the present situation. It explains how each parameter affects the sound.

Beat Sound Source Settings Panel

The buttons numbered 1 to 16 at the top of the screen are the step sequencer. They are used to create 16-step rhythm patterns.
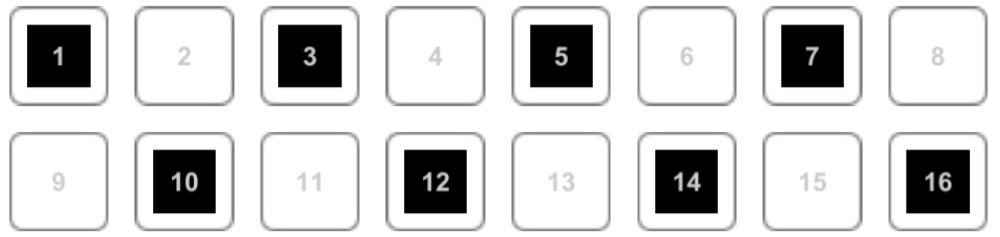
Using the Step sequencer:
For example, if you turn on only steps 1, 5, 9, and 13, it will create a basic four-on-the-floor rhythm: “boom, boom, boom, boom.”
Set the speed of the sequence.
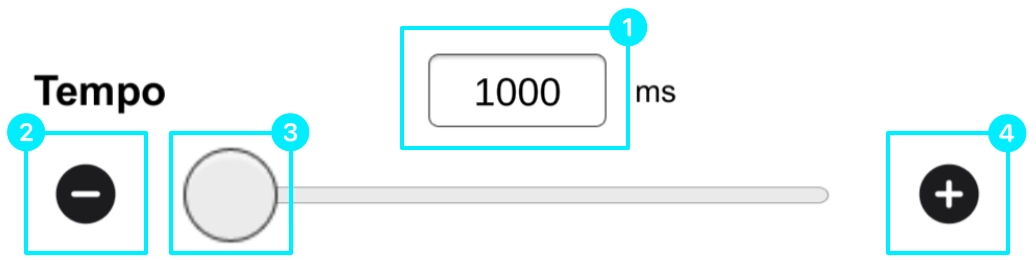 Tap the minus button to decrease the carrier wave cycle. This lowers the pitch. Holding the button continuously reduces the value further.
Tap the plus button to increase the cycle, raising the pitch. Holding the button continuously increases the value further.
Tap the minus button to decrease the carrier wave cycle. This lowers the pitch. Holding the button continuously reduces the value further.
Tap the plus button to increase the cycle, raising the pitch. Holding the button continuously increases the value further.
Sound Changes:
Sets the delay time from when playback starts until the sequence begins.
Effect on Sound:
Set the time between 16 and 1 on the step sequencer.
Effect on Sound:
Set the strength of the vibrations.
Set the pitch of the sound to be played.
Effect on Sound:
Related to the time the sound sustains at maximum level. Adjusts the length (sustain) after the sound's attack.
Effect on Sound:
Set the time it takes for the sound to decay and disappear. Adjusts the length of the sound's reverberation.
Effect on Sound:
Set the amount of distortion applied to the sound.
Effect on Sound:
Set the timbre (tone color) of the sound.
Effect on Sound:
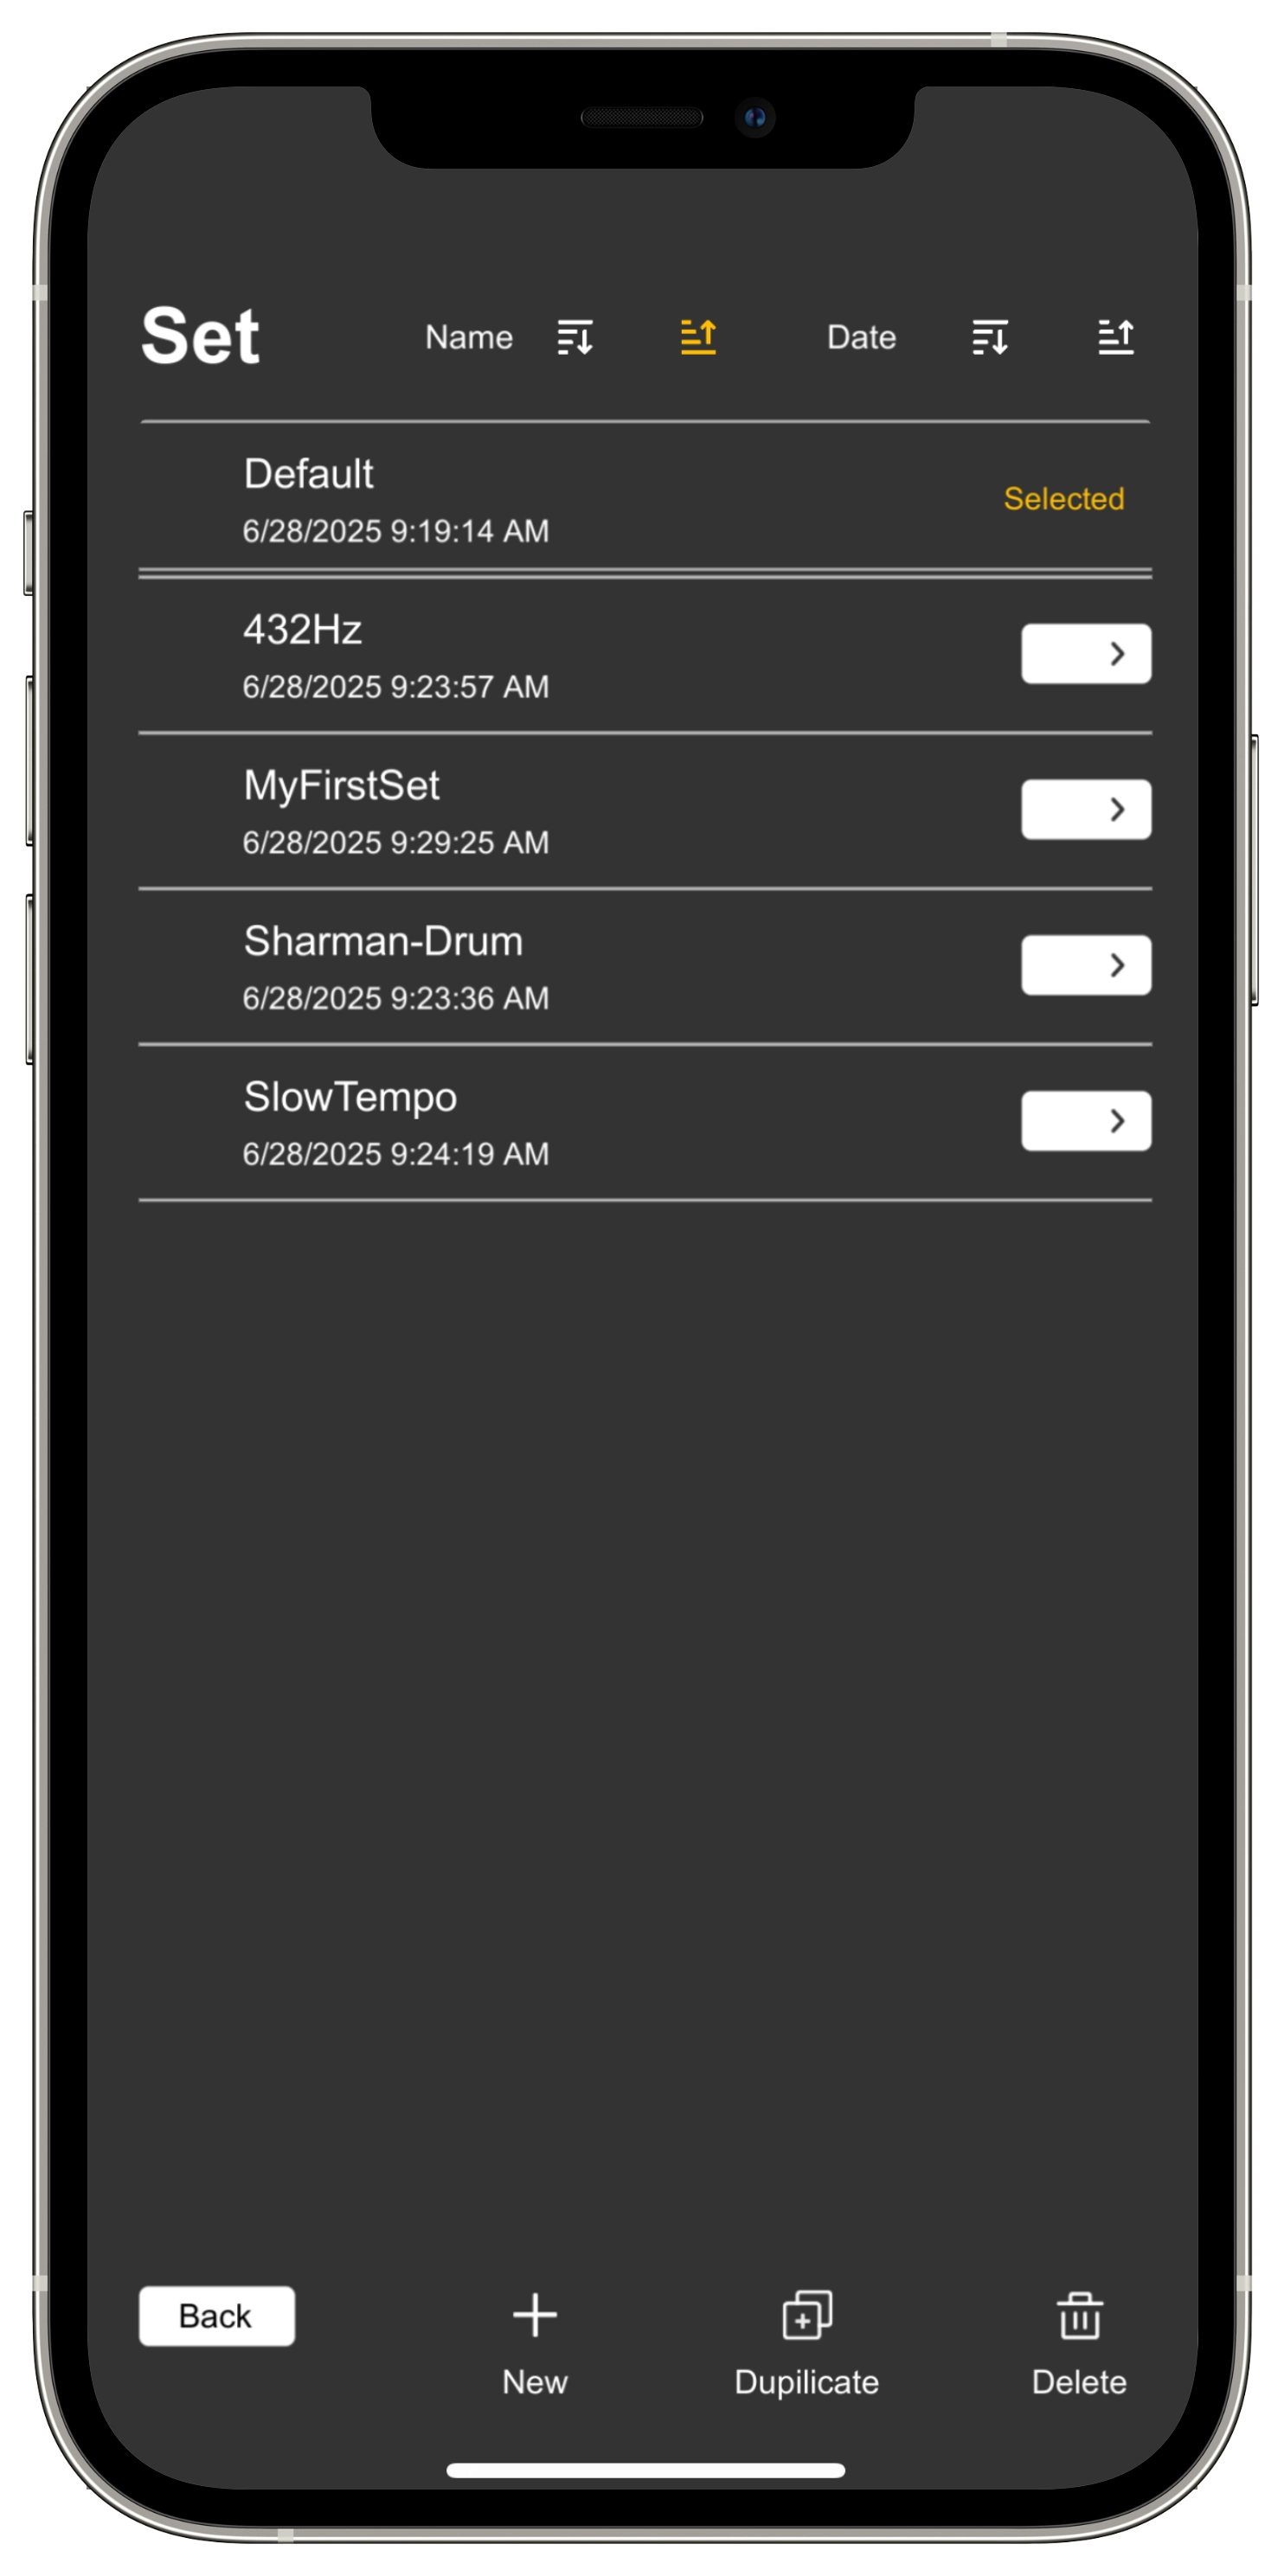
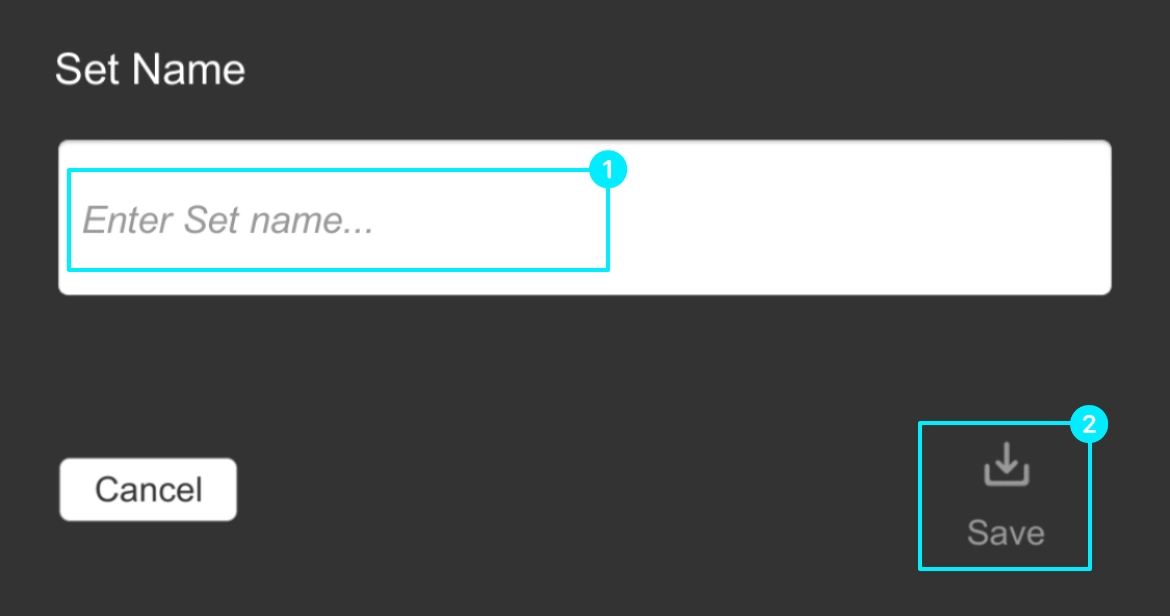
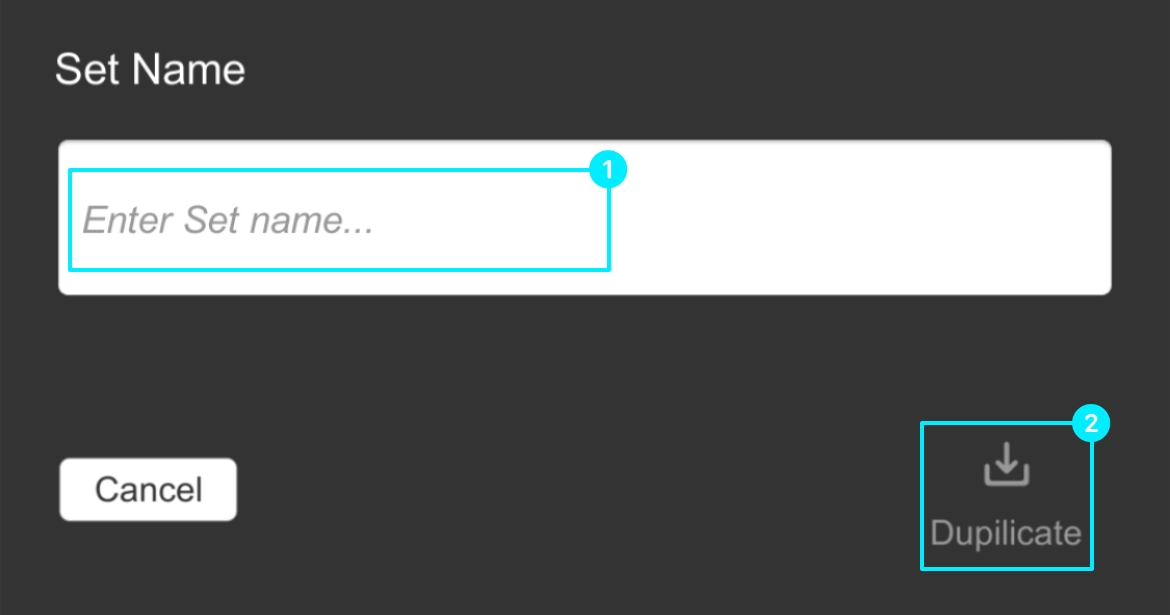
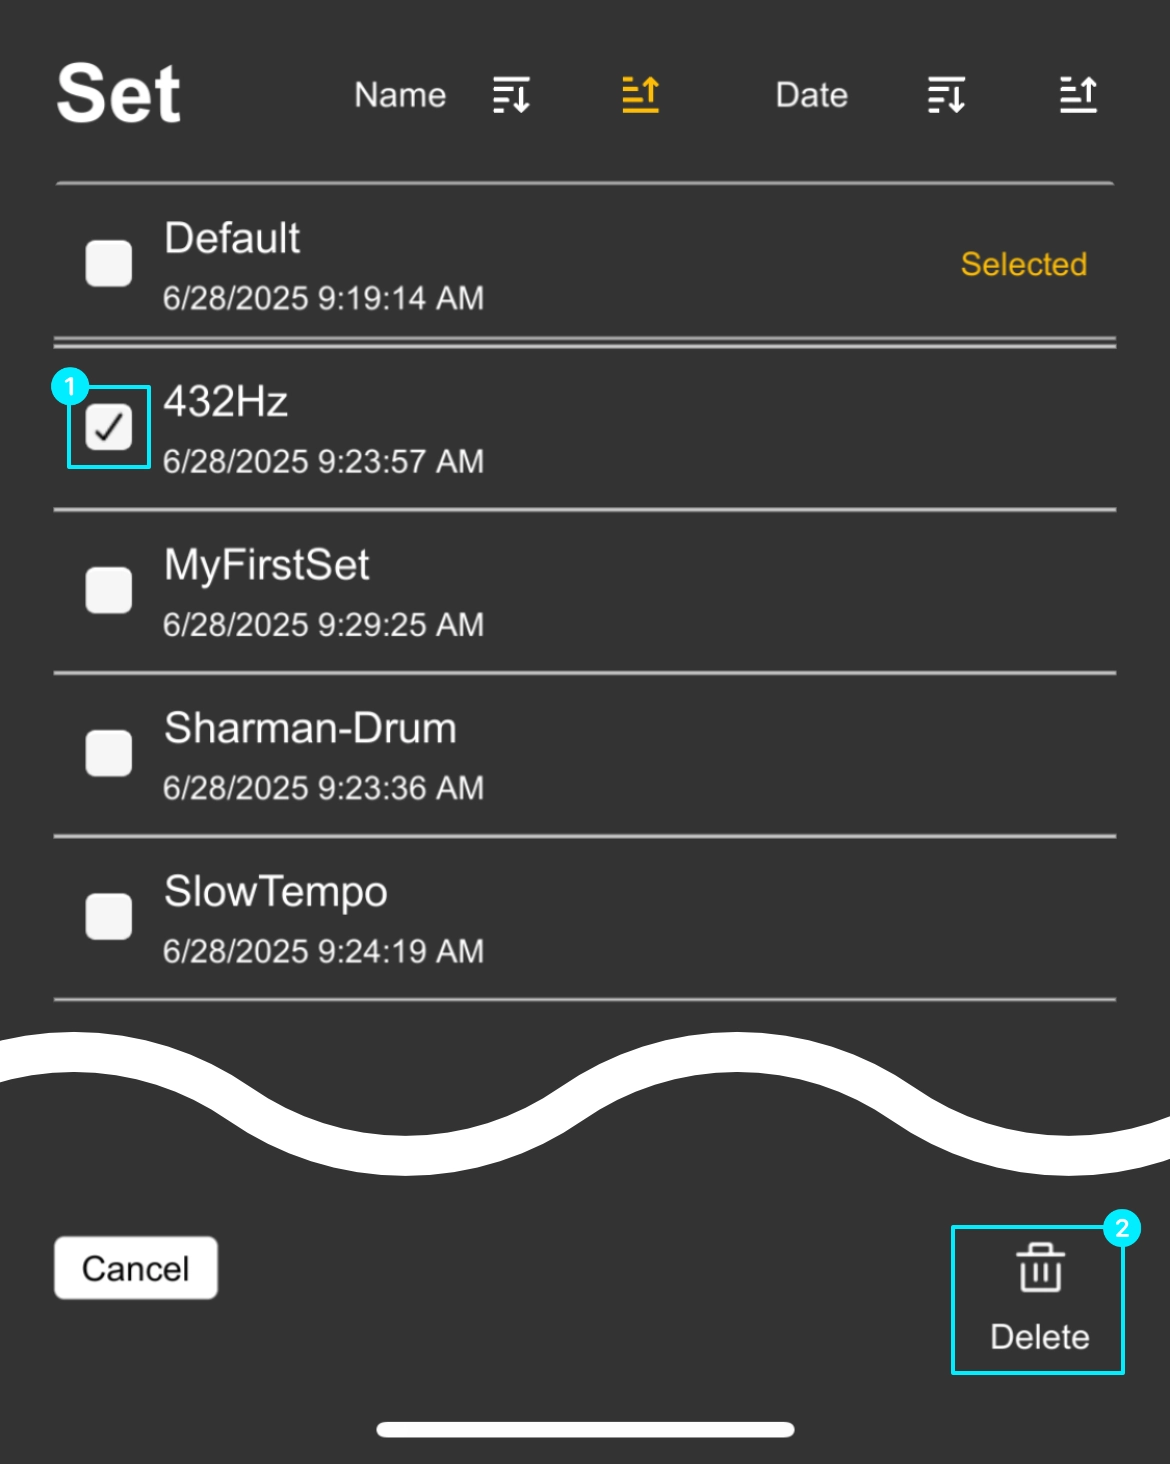
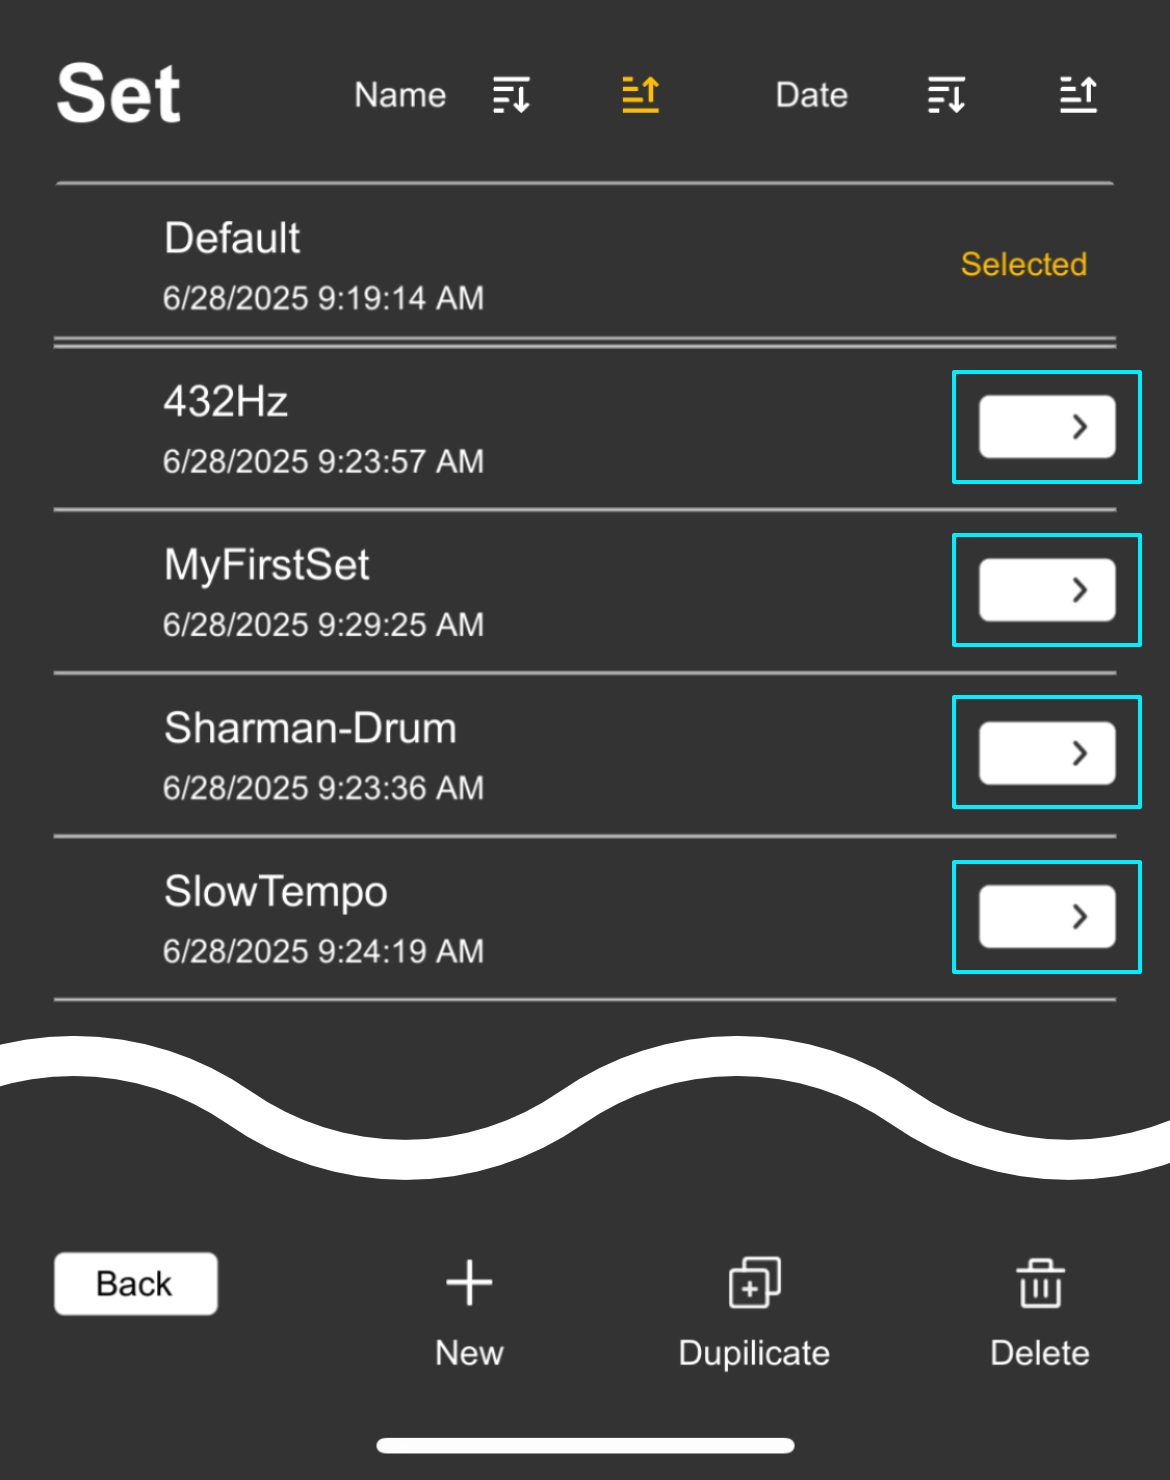
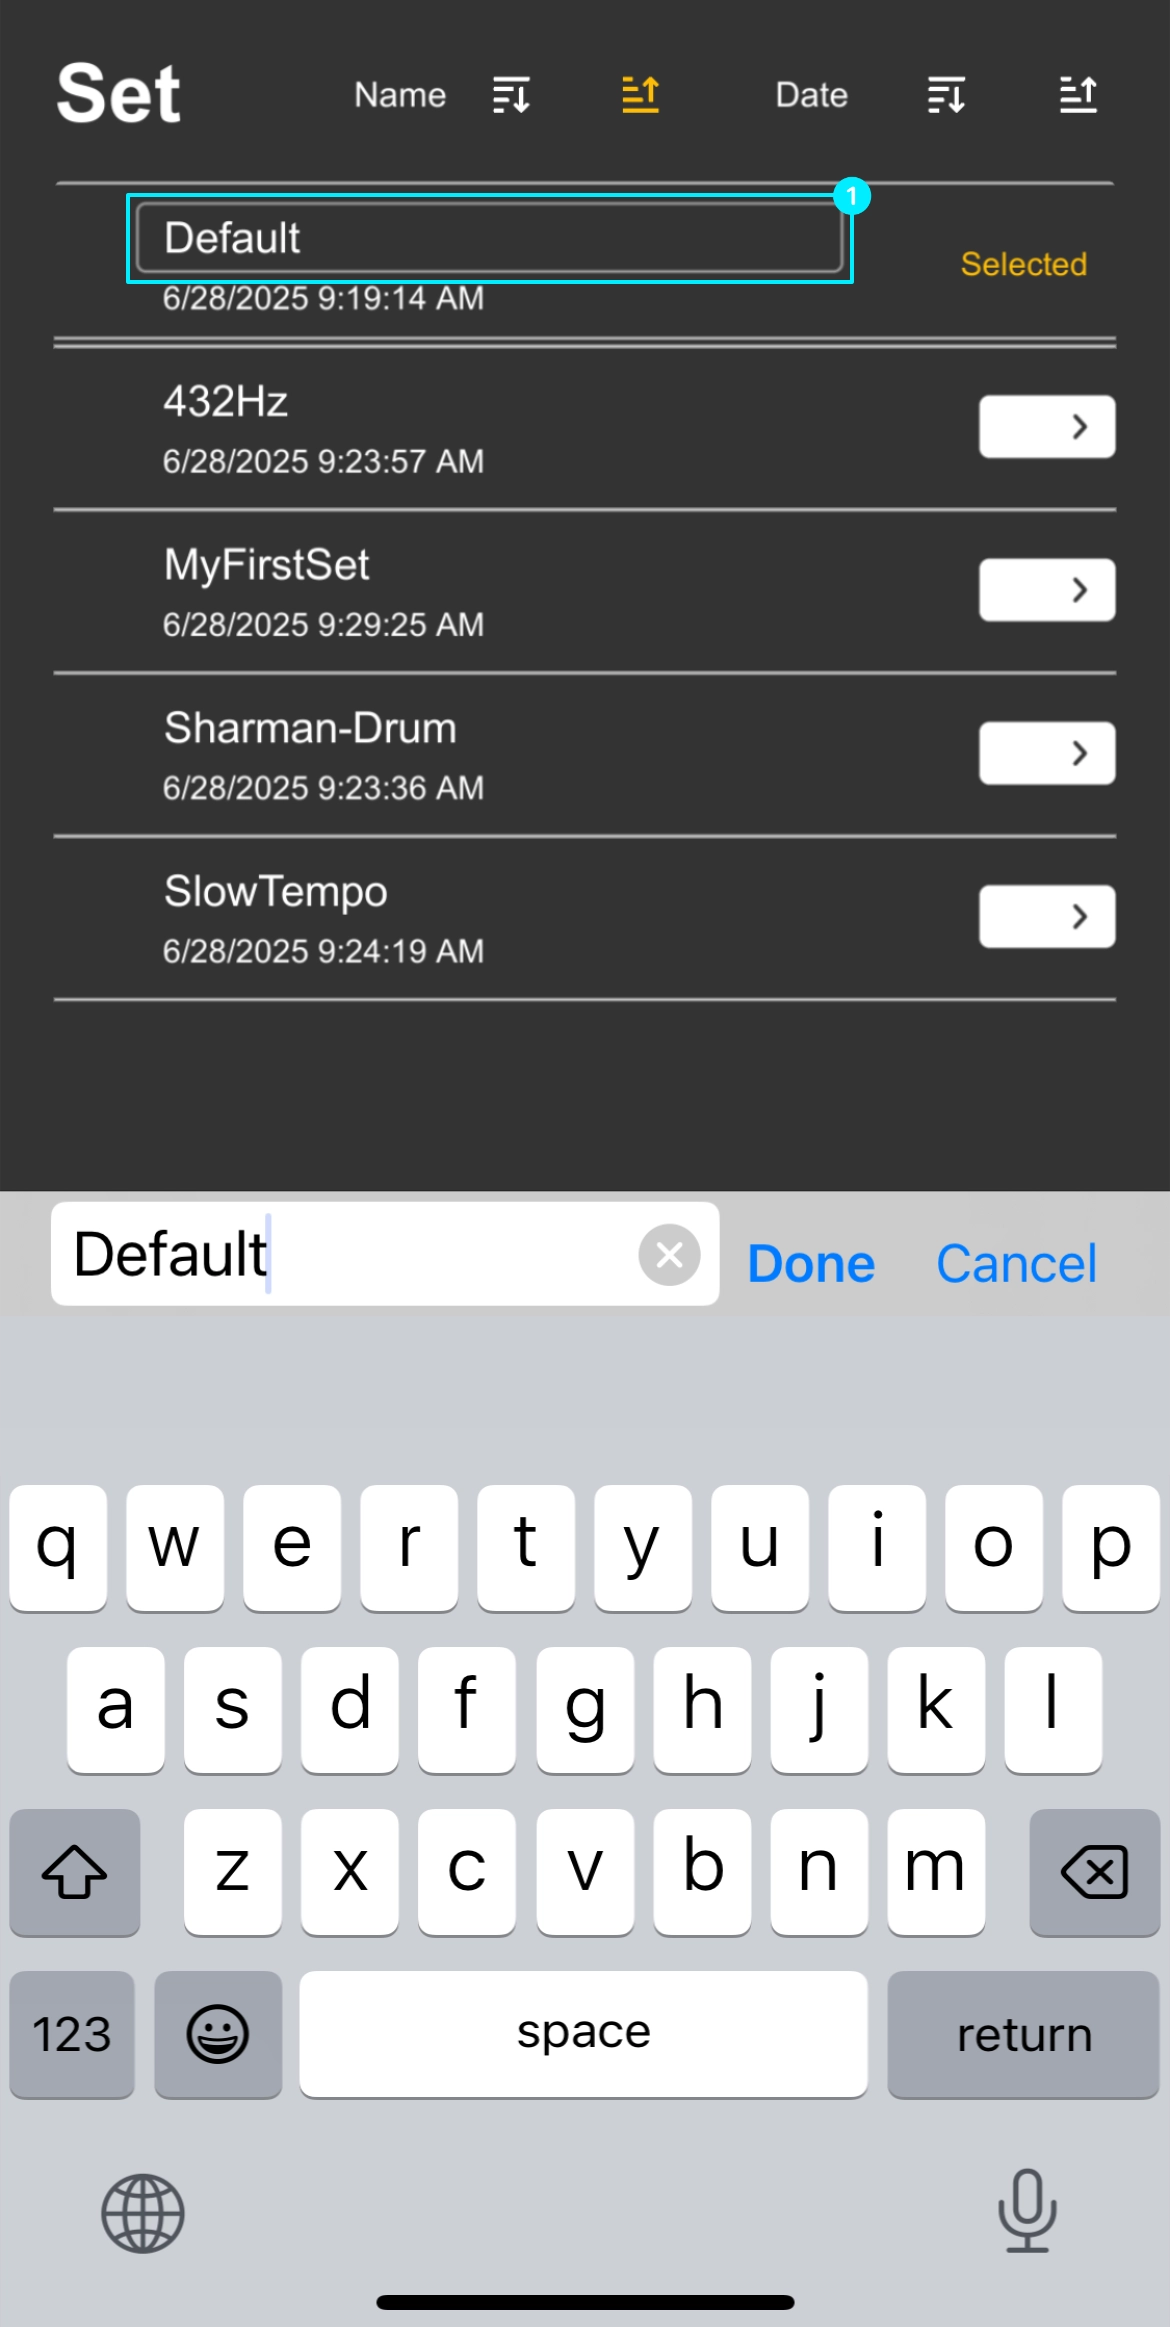
You can save the setting information of the sound sources placed on the Create Set Screen as a set. Multiple sets can be created and saved, but multiple sets cannot be used simultaneously. The Set Screen has four functions: Create New, Duplicate, Delete, Select and Rename.
Plays the sets created in Create Set according to the playback order configured in Playlist Management.
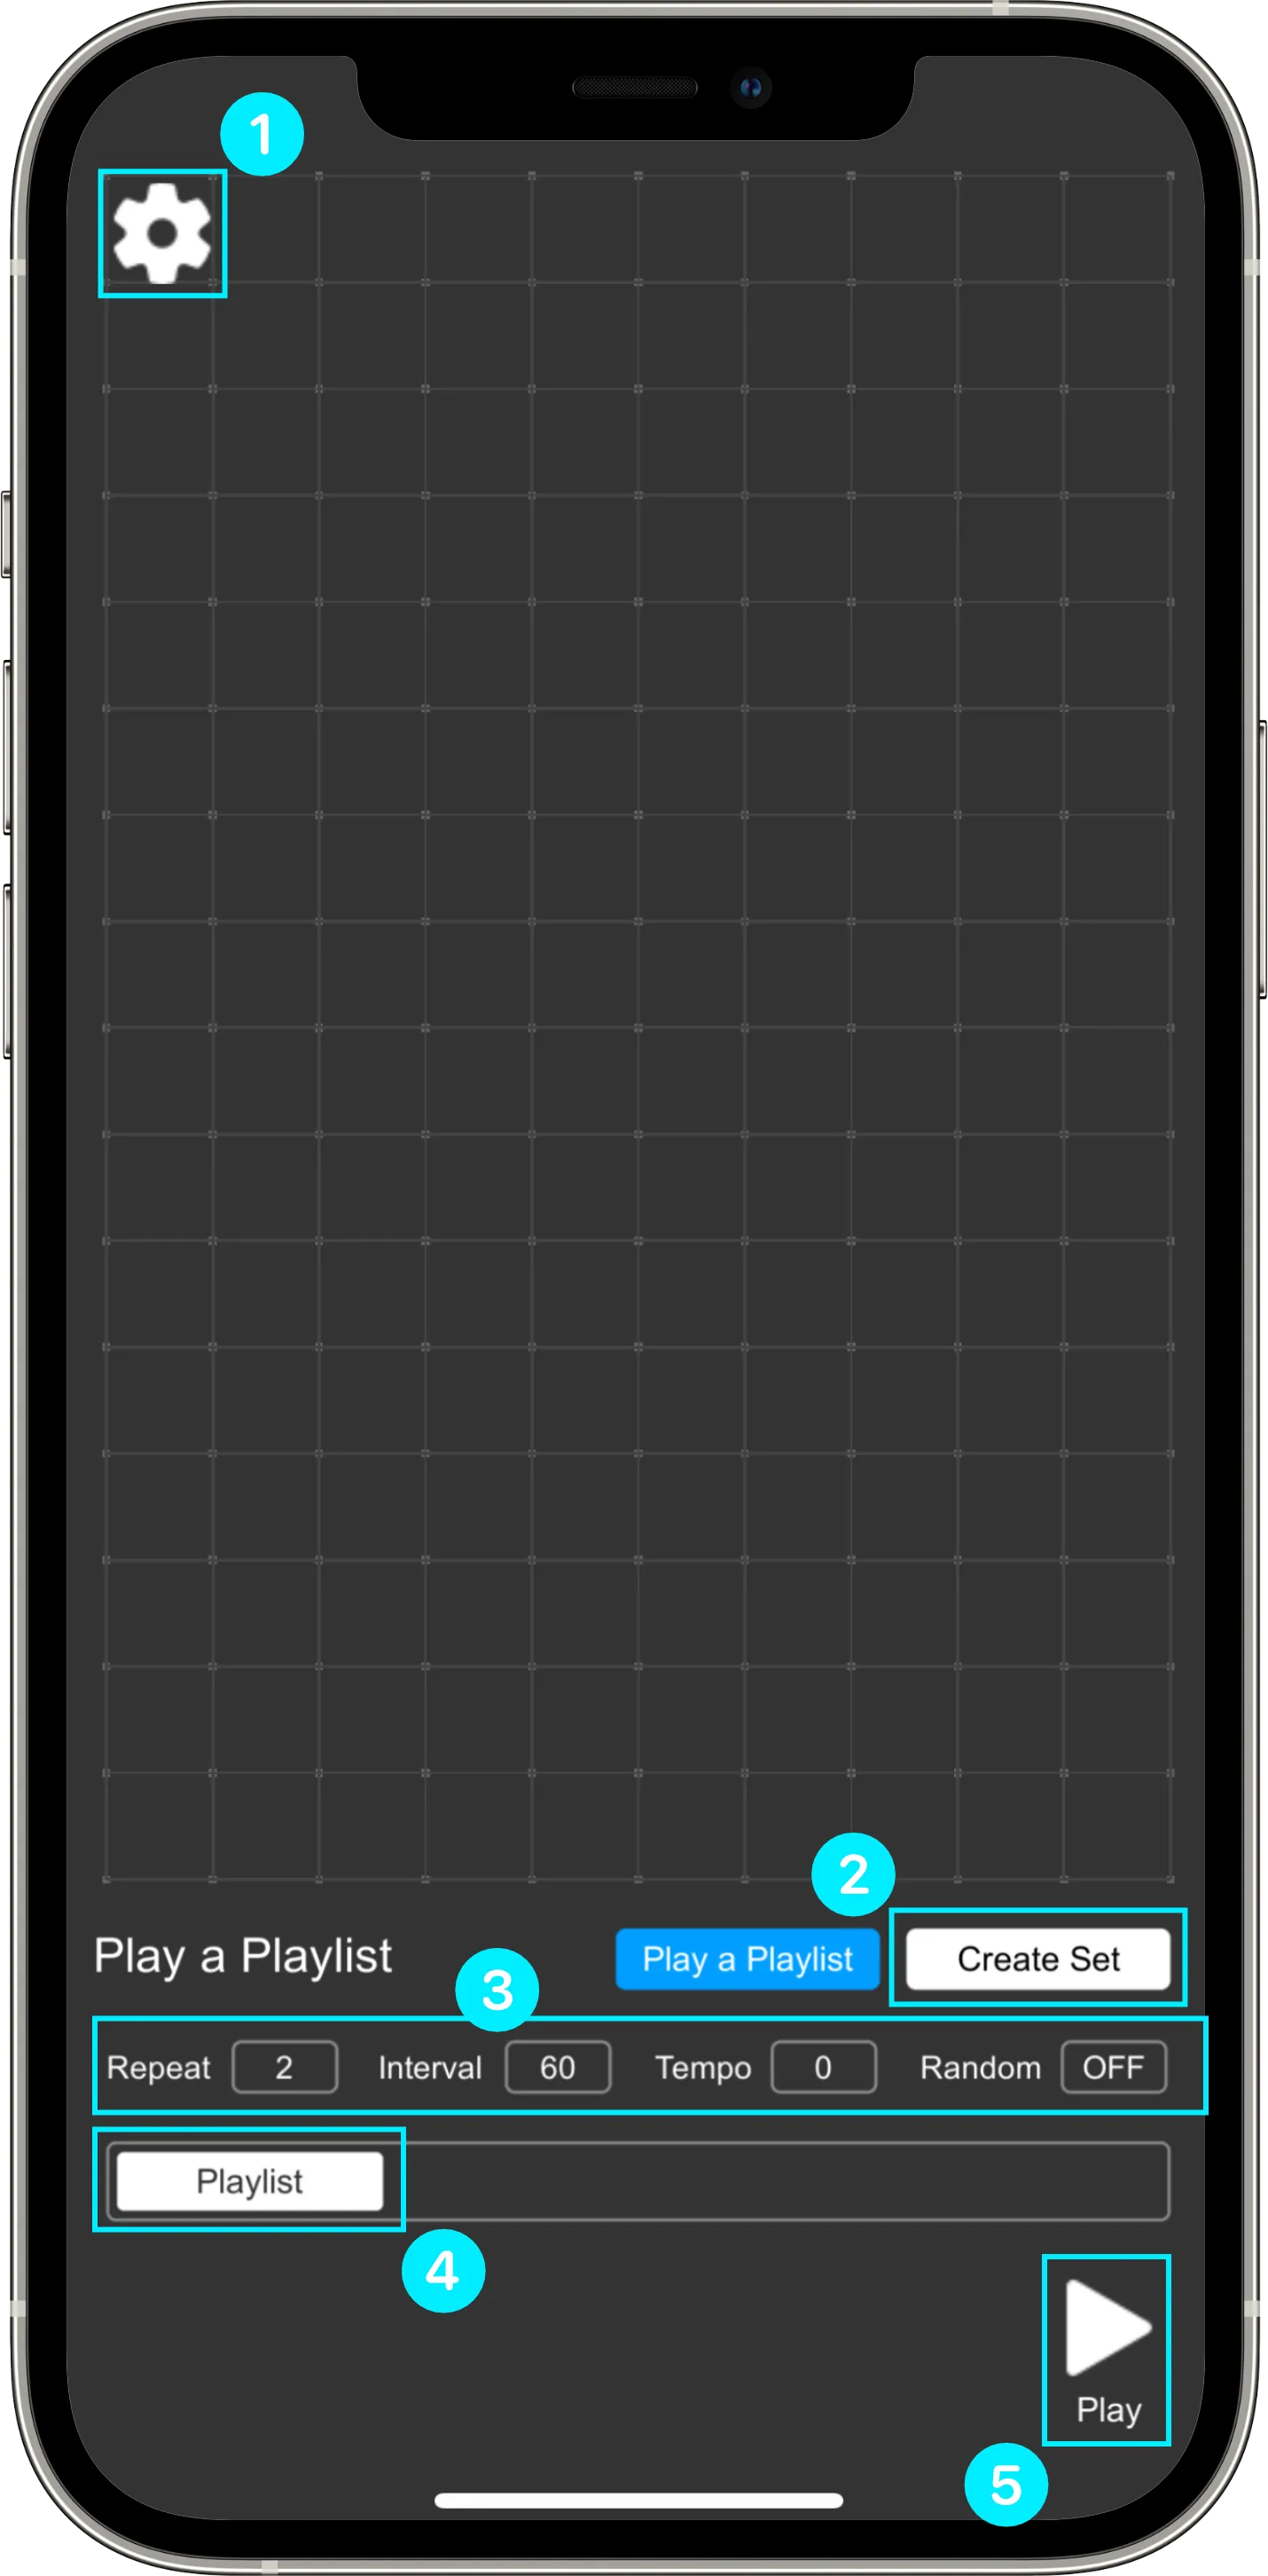
Play a Playlist Screen
Editing is not available on the Play a Playlist Screen. Please use the Create Set to modify sound sources.
Set the parameters for Playlist playback.
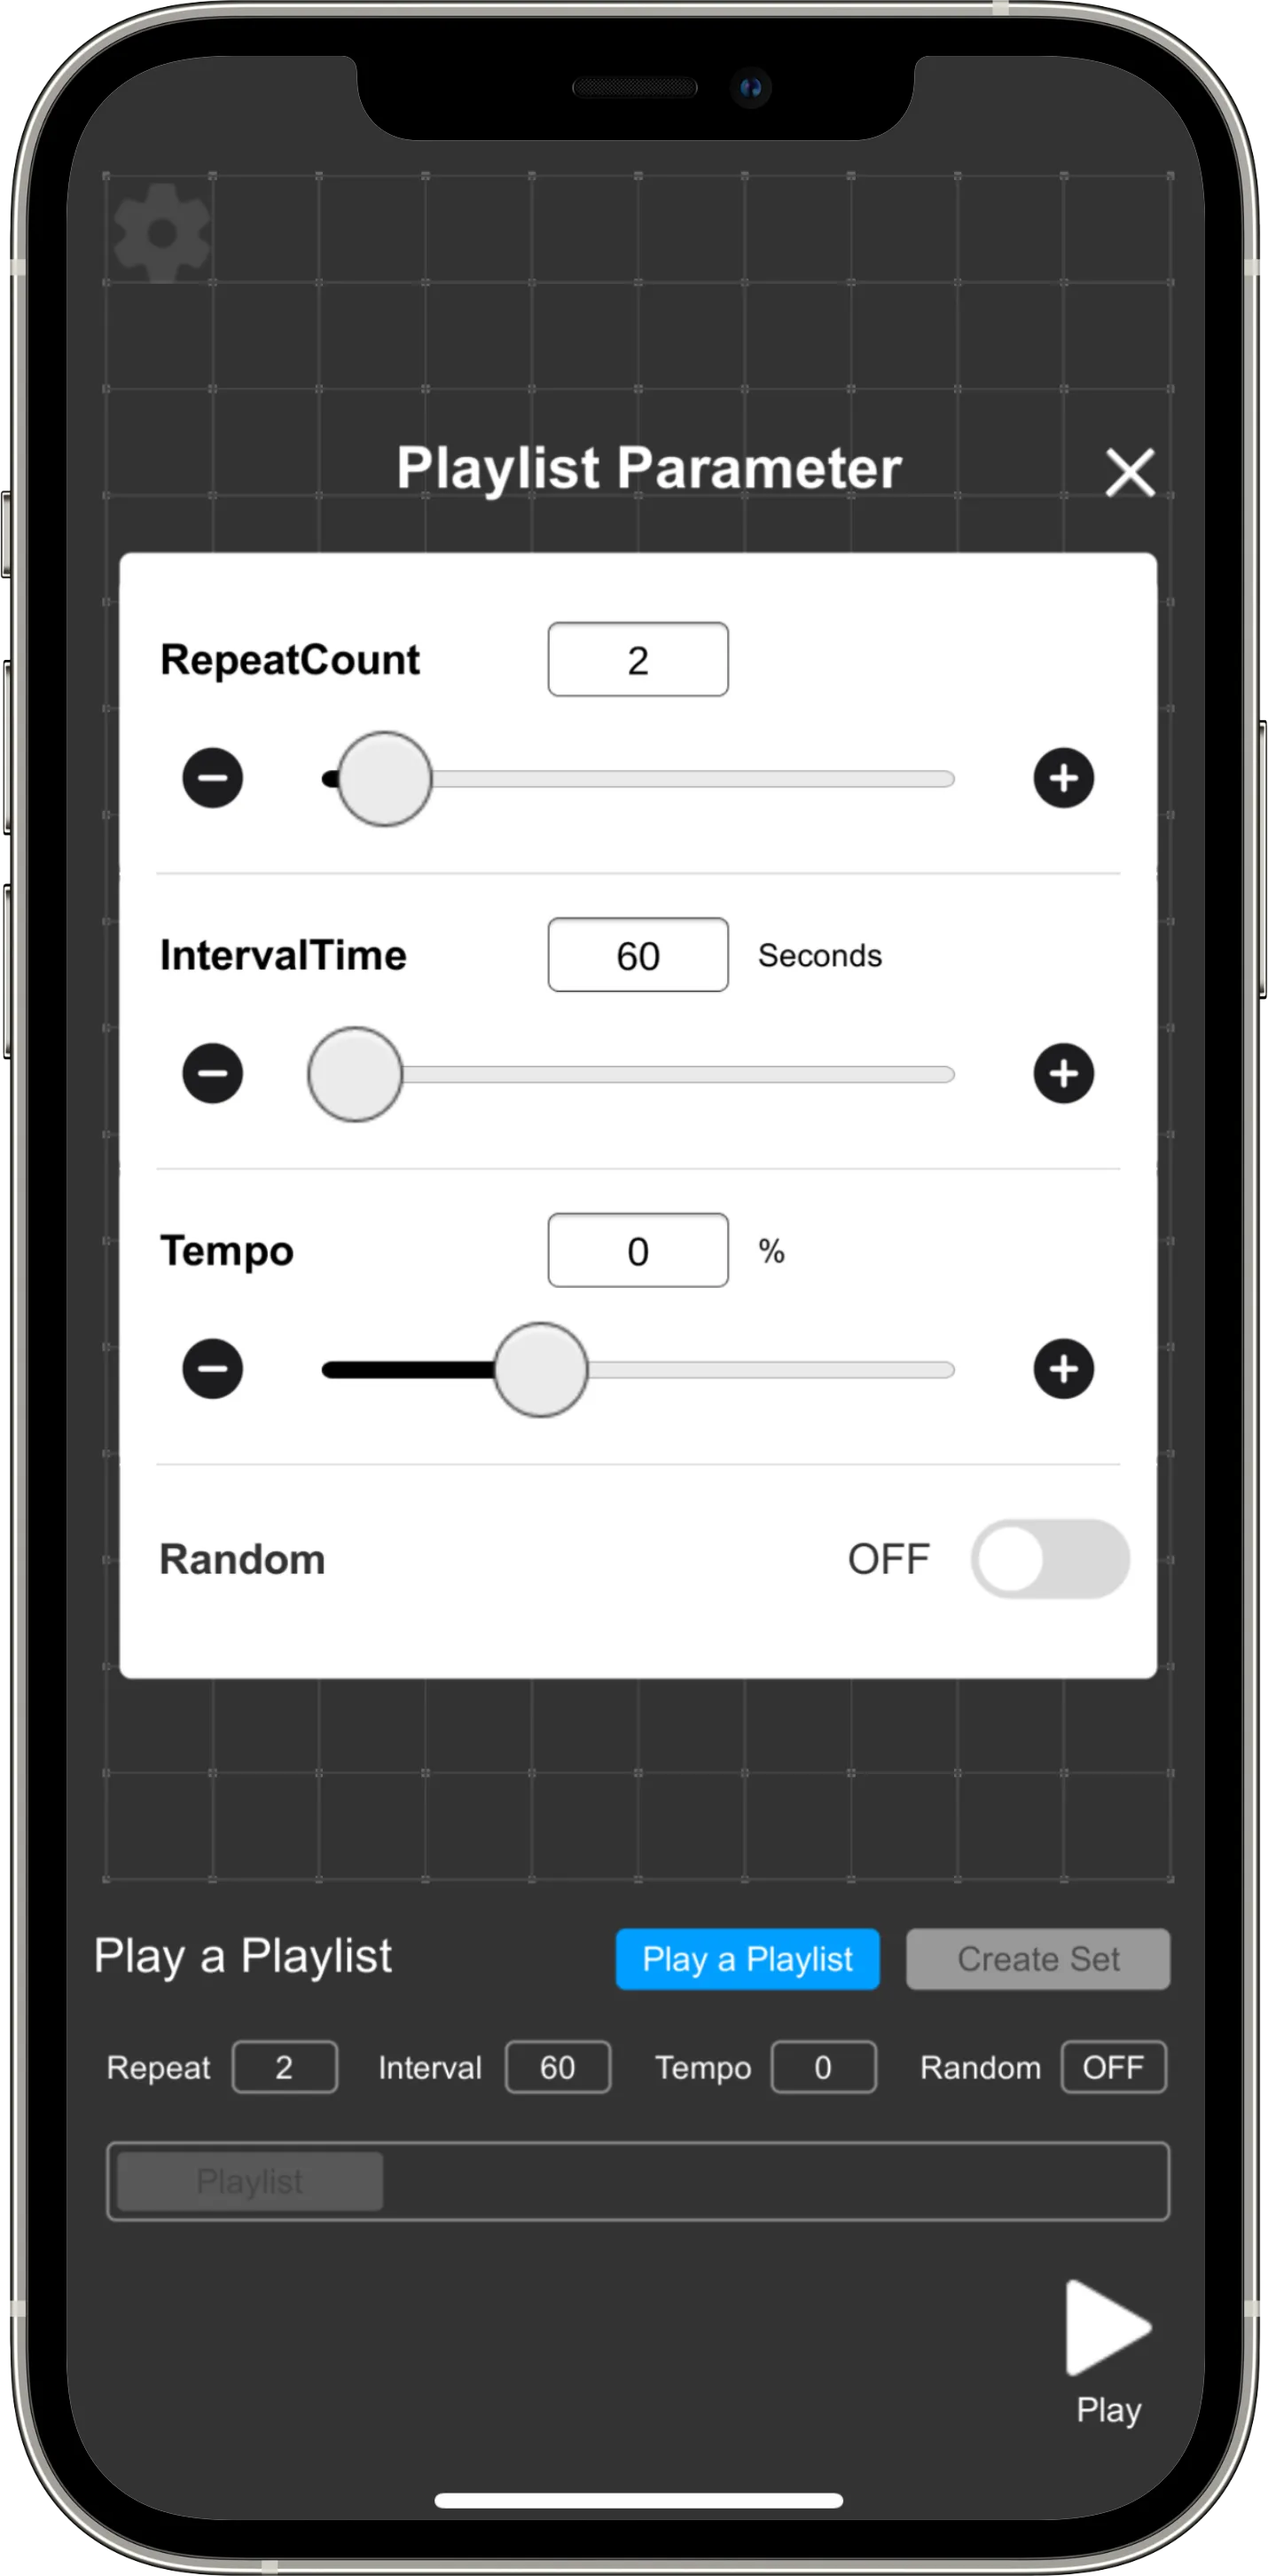
Playlist Parameter Screen
Set the number of times a set is repeated.
If you set it to "2" as in the example, it will play one set twice, then the next set will play twice.
Sets the waiting time (in seconds) between playing the last set registered in the playlist and playing the first set.
Adjust the tempo of the beat sound sources registered in the set between -50% and +100%. Setting a negative value increases the tempo, while a positive value decreases it.
When you turn the switch ON, it will disable the playback order of the set selected in Playlist Management and play the tracks in random order.
Example of operation steps: Speed up the tempo slightly and play 5 times at 30-second intervals.
A list of Sets created in the Create Set is displayed. You can select the set to be played in shuffle mode from here.
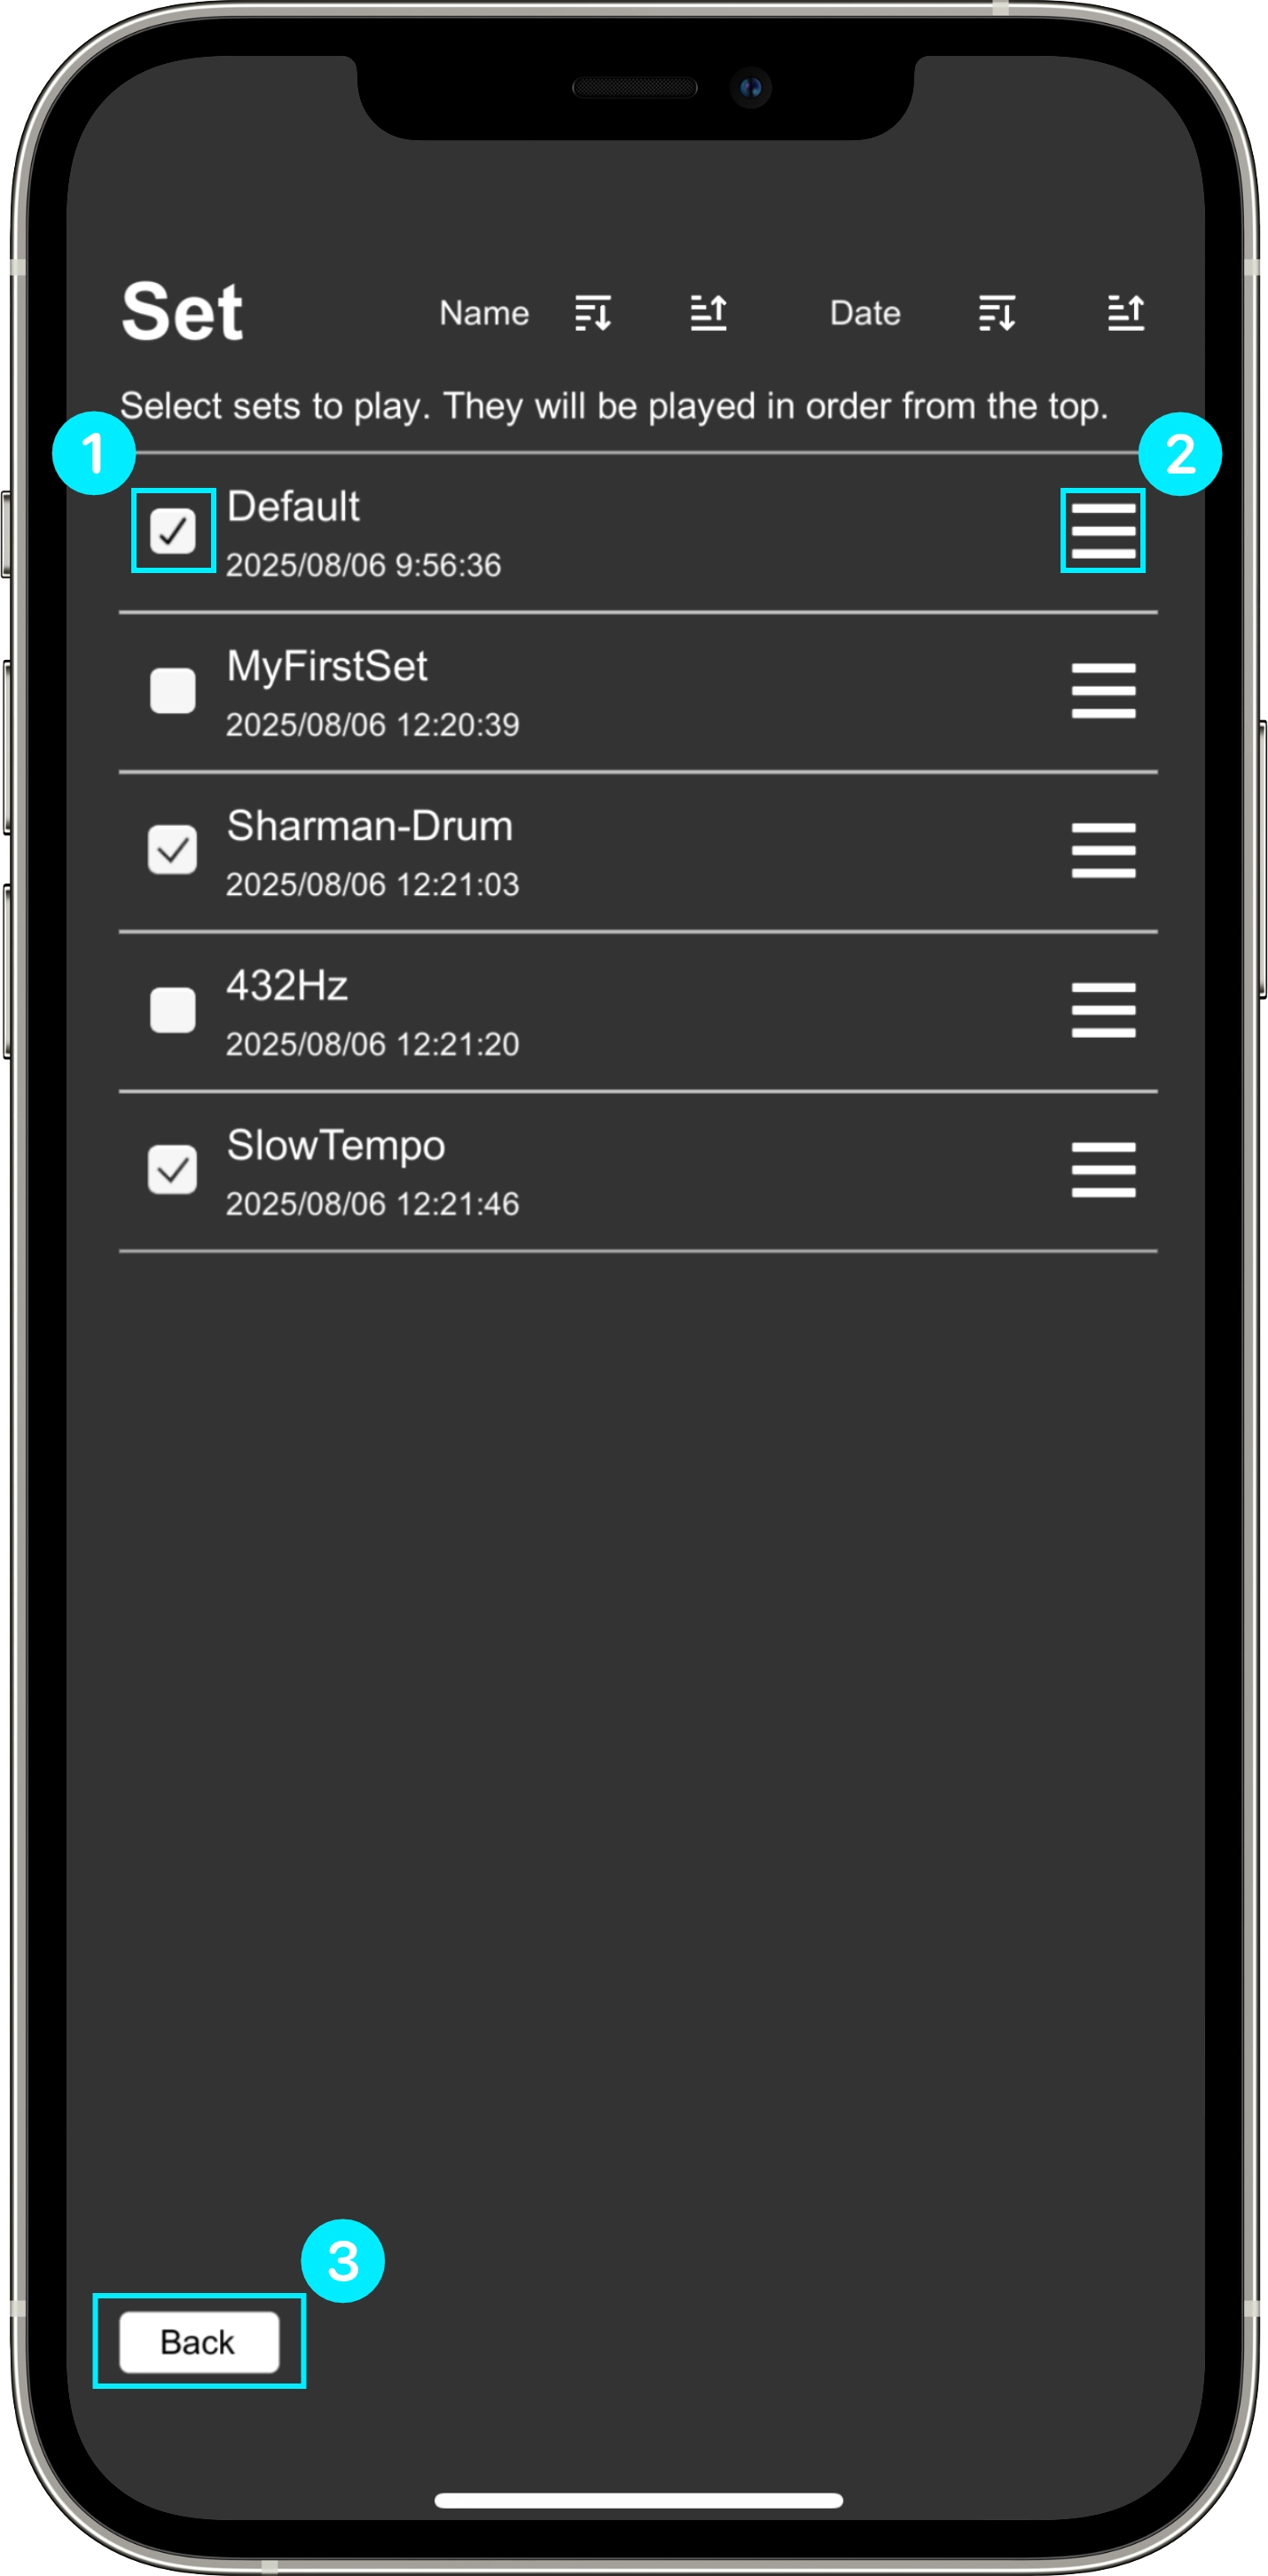
Playlist Management Screen
In the case of this screen:
The sets will be played in the order of Default, Sharman-Drum, and SlowTempo. After SlowTempo finishes playing, it will return to the first set and play Default. MyFirstSet and 432Hz will not be played because their Set Selection Checkboxes are turned off.
If the playlist parameters are set to "Repeat 2" and "Interval 60," it will play in the order of Default, Default, Sharman-Drum, Sharman-Drum, SlowTempo, SlowTempo. After the second playback of SlowTempo finishes, it will wait for 60 seconds before returning to Default and continuing playback.
This screen allows you to upgrade to Deflekt Unlimited, set timers, and check the app's website and related information.
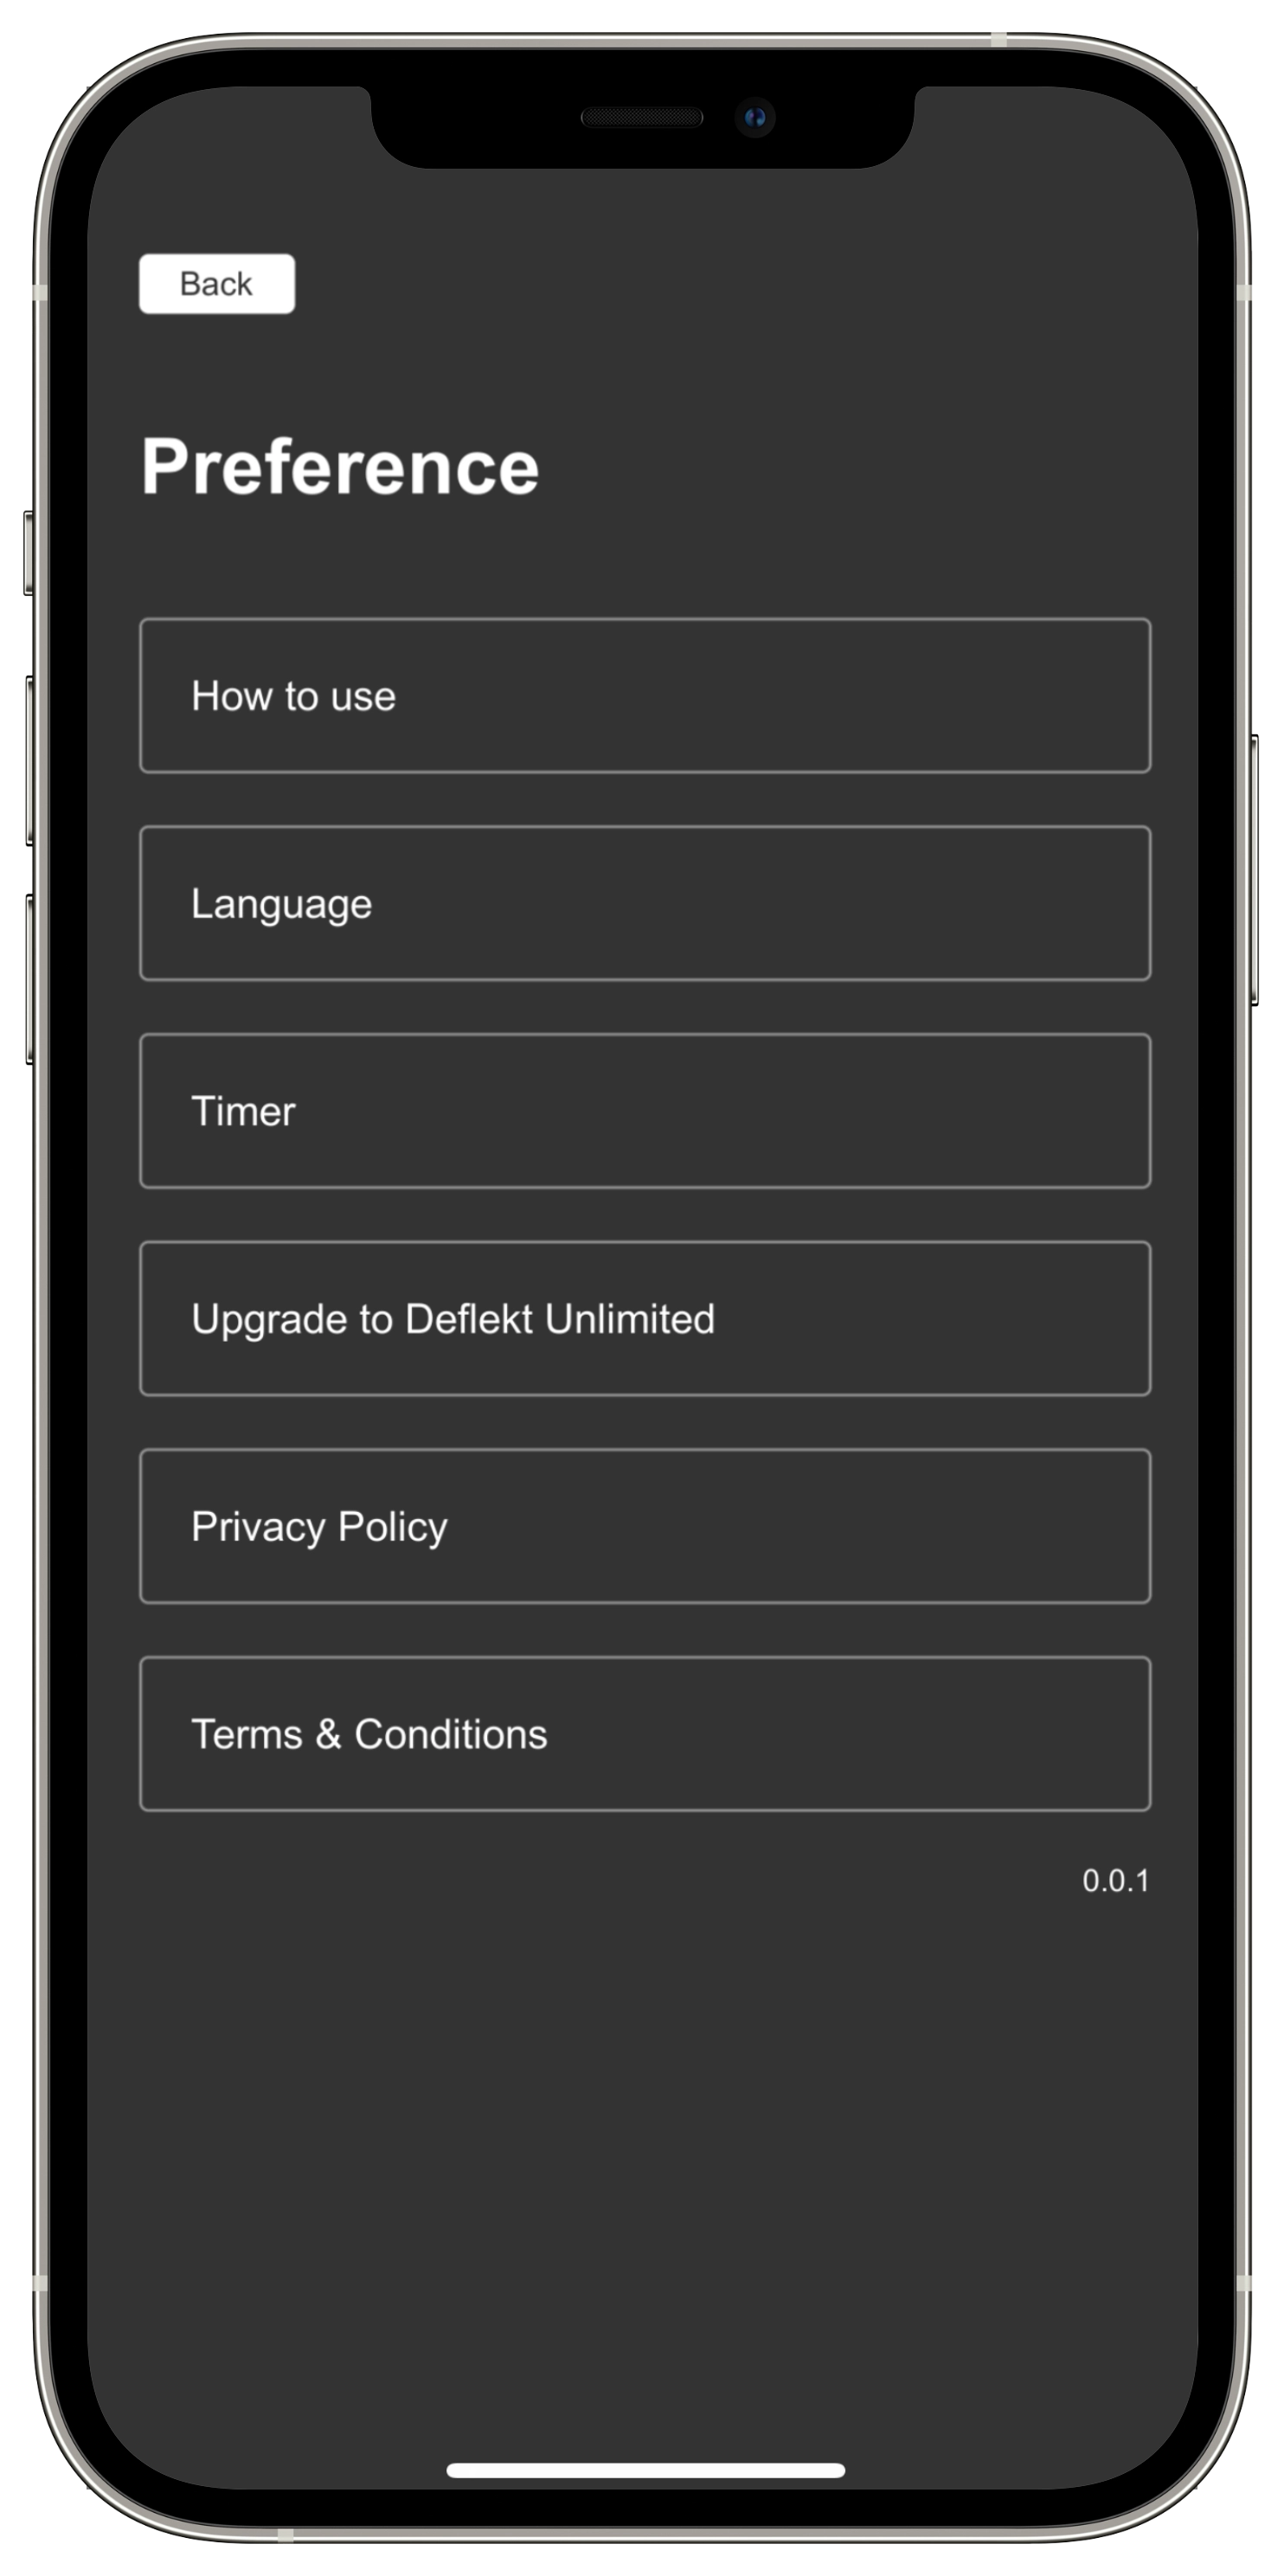
Preference Screen
Instructions on how to use the app and explanations of its features are displayed.
You can choose the language from English or Japanese.
Set the playback time of the sound source with the in-app timer. When the timer reaches the set time, the playback of the sound source stops. The timer can be set from 1 hour to 12 hours in one-hour increments.
The timer is only available after upgrading to Deflekt Unlimited.
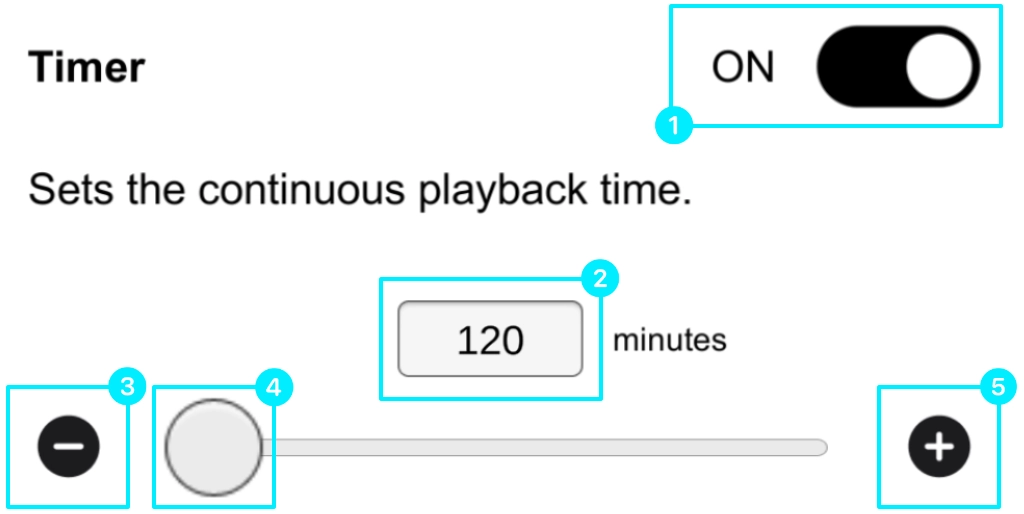 Tap the minus button to decrease the timer duration, shortening the playback time. Hold the button to decrease the value more rapidly.Tap the plus button to increase the timer duration, extending the playback time. Hold the button to increase the value more rapidly.
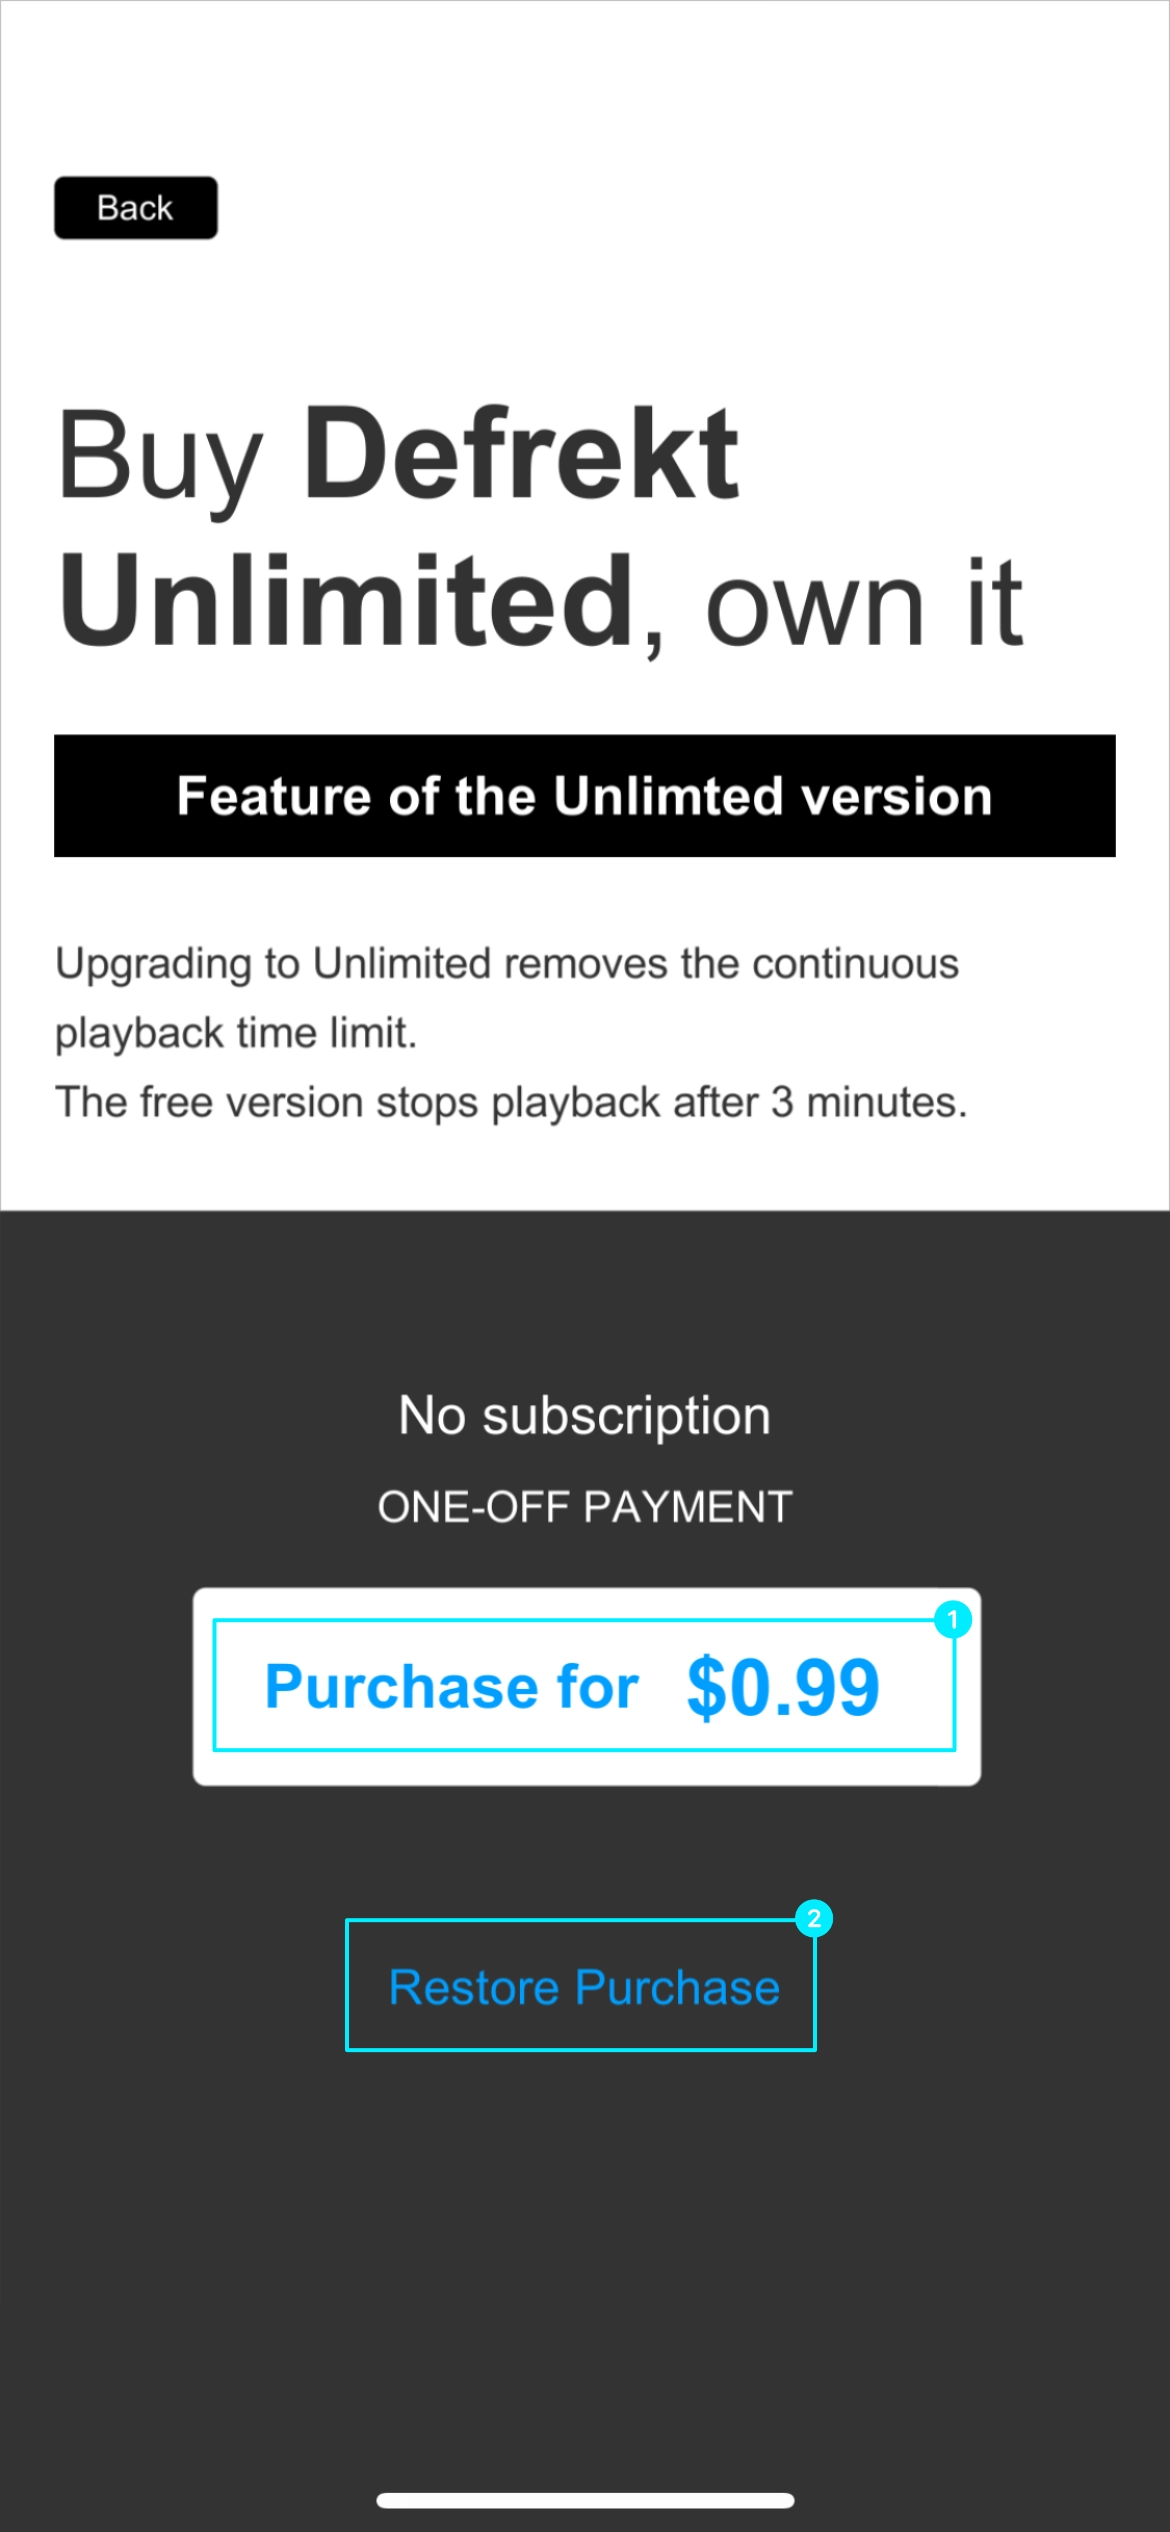
Deflekt is a free app, but upgrading to Deflekt Unlimited via in-app purchase enhances its features. The differences between the free and paid versions are the continuous playback time and timer function. The free version has a continuous playback time of 5 minutes, while the paid version has no limit. The timer function is not available in the free version.
You can check the app's Privacy Policy (Personal Information Protection Policy). It describes the policies regarding the collection, use, and protection of user data.
You can check the app's Terms and Conditions. It describes the rules, rights, and obligations for using the app.